Saturday 19 July 2008

BIRTHDAY CASTLE CAKE: PART 4...THIS BLOWS MY MIND! ALL DONE!


ta-daa! i did it! i finished bebe's 5th birthday castle cake!

now give me a glass of wine...


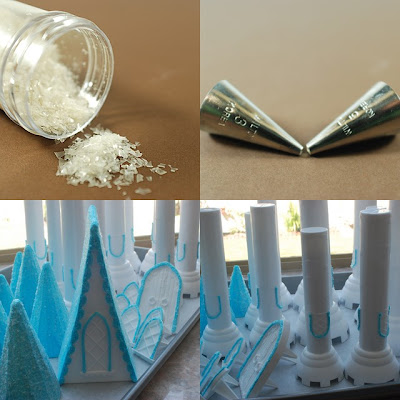
this is a long post full of pics...here's a collage if you're pressed for time...

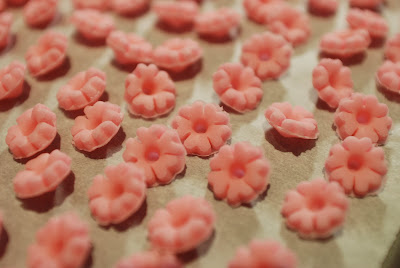
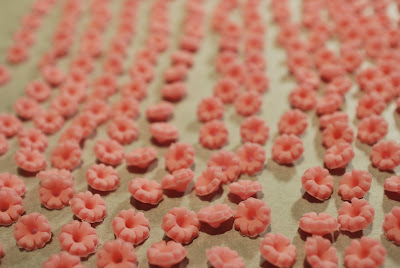
remember these little flowers i made a few days ago? all 330 of 'em? well, i'm so glad i made extra!i'd say i had about 40 or so extra little flowers left at the end. i'm bringing them along with extra buttercream for any emergency fix-ups i might need to perform on site.

and these sparkly iced conical roofs? yes indeedy, they came handy in completing this project.

the main roof was a cinch to attach...just plop it on the 10-inch cake!

this was my least-favourite part of making this cake: attaching the plastic dowels to the column bases, allowing it to set, and then shoving the whole thing down into the beautifully smooth surface of the cake layers. stupid dowels
There was a moment today when I kind of just stood there, catatonic; eyes glazed over.

My lower jaw dropped...piping bag still in hand.

My hands were stained an unearthly teal blue and my black apron was covered in confectioners' sugar. I couldn't stop staring at this monster I had created. Never in my life had I created a cake so huge. I thought back to this morning when I was reading and re-reading the instructions in my 2008 Wilton magazine, trying to decipher exactly what I had to do and foresee where I would meet up with catastrophe. I had come too far to let some stupid dowel-incident wreck the whole cake. Stomach, being the structural engineer that he is, warned me not to forego the plastic dowels. In fact, he poo-pooed the straw idea from Beranbaum (too bad!) and said that they might buckle under the weight. Mind you, it's his job to err on the side of caution.
So, I went with the huge dowels. Can someone tell me if there's a better way to stabilize the castle columns and also provide support for the top tiers? 'cause these stupid dowels not only puckered out my cake sides but they also took up good cake real estate!

and many thanks go to the wilton turntable you see below the cake. it was a lifesaver! the cake was super-duper heavy, but the turntable spun for me smooth-as-silk!

you can kind of see there's a little "post" on the top column. it's a wooden toothpick that i glued on with white chocolate. it's holding the little flag that says "happy 5th birthday..."


here you can see there are a few pre-made disney figures in royal icing. you can figure out the theme, right?
i also piped some buttercream "sea plants" and "coral" along the bottom of the cake for that underwater feel. don't you feel like you're in the ocean? ha ha!
The problem with the dowel support system is that it requires you to shove this 3/4 inch hollow plastic tube into a cake. What happens is it displaces some cake, forcing the sides of the cake to buckle...out! I had to hold my hand against the side of the iced cake to ensure that it didn't crack open. I was a tad concerned. here you can better see some of the coloured spray i employed. what a cool toy!
Fortunately, I had sprayed the whole teal blue cake with a series of colours: blue, green and violet to add some interest and dimension. As well, I realized I'd be decorated the heck out of it so I hoped to cover up some of the bulges from the hidden dowels. I used white chocolate candy melts to "glue" the castle columns to the cake base and to attach the conical roofs to the column tops. you have to shove the little plastic door into the cake side before decorating with flowers. at one point, i was thinking there was way too much plastic than there needed to be...
by now, you've figured out the theme: it's Ariel's Castle! under water! and people, i was too lazy to sprinkle brown sugar on the cake base to make it look like the bottom of the ocean. i also wanted to add little crabs and other sea life but heck, i just want this over with now!
This was truly a labour of love. That moment I had in the morning was interesting. I had a smidgen of doubt and wanted to just not do this anymore. Fortunately, this passed and I kicked myself into high gear. The tasks were actually very easy to complete and I didn't have any problems. It was just a lot of work...
Now, I'm crossing my fingers that this'll all get transported to the site in one piece.

yikes! mustn't forget the "Ariel" candle!
Thank you so much Sally, from PinkBytes, for bestowing this "Hard Working Food Blogger" Award to me! I'm very grateful to the many people who visit me and to the cool bloggers who take the time out to leave comments. I read all of the comments and I like how it connects us all from around the world! I will be passing this award along when I'm back from my post-castle-cake vacation!

Thursday 17 July 2008

BIRTHDAY CASTLE CAKE: PART 3...CHOCOLATE BUTTER CAKE

you may wonder: why is this cake missing the crust (the best part!)? well, read on and see..

No cake mixes here, buddy!

For Bebe's 5th Birthday Castle Cake, I soon realized that in order to make a 2-layer 6-inch cake and a 2-layer 10-inch cake, that I'd have to do some finagling with some recipes. I looked through all of my books and only the professional ones had charts to scale cake batter for tiered cakes. The problem was the 10-inch cake because most ordinary recipes make 8-inch or 9-inch cakes. None of the usual recipes in my cookbooks created 10-inch cakes.


Also, I know from my readings, that you can't just scale up all the ingredients for a 10-inch cake. The baking powder proportion has to be decreased for larger cakes. It's counterintuitive, but Rose Levy Beranbaum in The Cake Bible gives a good lesson in science:
"The larger the pan size, the less baking powder is used in proportion to the other ingredients. This is because of surface tension. The larger the diameter of the pan, the slower the heat penetration and the less support the rising cake receives because the sides are farther from the center. Baking powder weakens the cake's structure by enlarging the air spaces, so decreasing the baking powder strengthens the structure and compensates for retarded gelatinization and the decrease in support" (Beranbaum 493).


the cook's treat is eating the crust. nothing goes to waste here! it was delicious.

I consulted Beranbaum's Cake Bible (my go-to book in emergencies) for the chocolate cake layers I was supposed to make for Bebe and decided to use her Chocolate Butter Cake base recipe. I wasn't going to screw up the "surface tension" in the 10-inch cake by scaling up one of my regular favourite cake recipes. I settled on her butter cake instead of the genoise because it looked easier and I like a good butter cake.

She had a list of instructions that initially looked really complicated. It was a series of calculations you needed to complete that included finding out the "Rose Factor". The Rose Factor is what you multiply her base recipe by in order to make different size cakes. After reading it a couple of times, it became much more clear and I decided to make the 6-inch cake today to test out how it worked. What was important to me was the little chart with the special baking powder requirements for different size layers.

In addition to making the cake, Beranbaum advised a simple syrup for the butter cake in order to maintain freshness and moistness. This I decided to do because I was indeed baking the cake ahead. I would wrap it tightly in plastic wrap and store it in the refrigerator until I was ready to ice it with my buttercream.

when you gently lift of the top crust of a baked cake, you can more easily see the "pores"

What intrigued me the most is her suggestion to use drinking straws (not the bendy type!) in order to create structure in tiered cakes. This would replace the wooden dowels or plastic dowels most people use. I simply love this idea, though I already purchased the plastic dowels. The dowels leave a big foot-print in my opinion. They're not so slender and they can't possibly be easier to cut than straws. That, and the straws are cheap. Or free if you happen to "collect" them from fast-food outlets...and I am so not advising you to do this ;) I just happen to have 3 or 4 boxes of different kinds of straws at home because I have kids and they insist on drinking everything through straws.

Seeing as Stomach is a Structural Engineer, I guess I could ask him. I know during university, I saw him and his peers with McDonald's straws doing amazing geeky-engineering stuff with them. However, I have faith in Beranbaum and my intuition tells me she's right. I mean, the straws would be just as strong as dowels in their application. I also like that they'll take up less cake real estate.

This straw idea appeals to me on so many levels!

So, after I baked these cakes, I cooled them and gently peeled off the top crust using a little thin spatula (actually it's a nifty thin plastic sandwich spreader) and lifted off the crust and set it aside in a little bowl. Exposing the cake interior, you can see the fine crumb and tiny holes. I think that's supposed to be good. I hope. If you don't peel off the top crust, the syrup won't easily be absorbed into the cake interior. In fact, a lot of the syrup might just roll off the crust altogether. It just makes sense to peel off the crust. Just do it. Then eat the crust yourself...mwah-ha-ha! Then, you sprinkle syrup over the cake if you intend to serve it more than 24 hours later. The cake itself is supposed to stay well for 2 days at room temperature or 5 days in the refrigerator (and 2 months frozen). I'm keeping my layers in the refrigerator and I'm sprinkling the syrup because I want a moist cake when I serve it.

One problem I encountered with the syrup-sprinkling was trying to evenly sprinkle the syrup without mussing up the surface of the cake. I didn't want to touch the delicate crumb with a pastry brush. I also didn't want to use a spoon because you sometimes get big blotches of syrup in some places and none in others. I rummaged in my kitchen drawers and found one of those plastic scoops that you find in baby formula cans. They hold a little over a tablespoon of liquid and they have a tiny little hole in the bottom. I positioned the formula scoop over the cake top and used a tablespoon to pour the syrup into the scoop. It dripped out perfectly! The dripping was constant, but not too fast. I moved the scoop over the top of the cake layers in a spiral from the outside crust to the centre of the cake. The syrup dispersed evenly and I was doing the happy dance.

I used just a few tablespoons per cake. Perhaps this was too much? I don't know. I will also admit that I think Beranbaum mentions somewhere how much syrup you need for different size layers yada yada but of course at 10pm I wasn't going to flip through and read more! I couldn't tell how far the syrup seeped through the cake but I didn't want to overdo it and have a mushy cake.

Next post will be probably include a lot of swearing. I'm supposed to do the frosting, dowelling and stacking. Please excuse my potty-mouth in advance. Be forewarned.

Here's the proportions I used to make the 6-inch layers and the 10-inch layers. I insist you purchase Beranbaum's Cake Bible if you haven't already. Unfortunately, it's devoid of pictures for every recipe, but this woman knows what she's talking about!

6-INCH CHOCOLATE CAKE LAYERS (Rose Factor 2!)

  • 42 grams unsweetened cocoa
  • 156 grams water (boiling)
  • 2 eggs
  • 6 g vanilla
  • 158 grams sifted cake flour
  • 200 grams sugar
  • 1/2 t. salt
  • 151 grams unsalted butter, softened
  • 16 grams baking powder (almost 4 teaspoons)

10-INCH CHOCOLATE LAYERS (Rose Factor 5!)

  • 105 grams cocoa
  • 390 grams water (boiling)
  • 5 large eggs
  • 15 grams vanilla
  • 395 grams sifted cake flour
  • 500 grams sugar
  • 8.35 grams salt
  • 378 grams unsalted butter
  • 37 grams baking powder
  • NOTE: use cake strips around the pans to promote even baking!
  1. Arrange 2 oven racks as close to the center of the oven as possible with at least 3 inches between them.
  2. Preheat oven to 350 degrees F
  3. In a medium bowl whisk together the cocoa and boiling water until smooth and cool to room temperature. In another medium bowl lightly combine the eggs, 1/4 of the cocoa mixture, and the vanilla.
  4. In large mixing bowl combine all the remaining dry ingredients and mix on low speed for 1 minute to blend. Add the butter and remaining cocoa mixture. Mix on low speed until the dry ingredients are moistened. Beat at medium speed for 1 1/2 minutes to aerate and develop the cake's structure. Scrape down the sides.
  5. Gradually beat in the egg mixture in 3 batches, beating for 20 seconds after each addition to incorporate the ingredients and strengthen the structure. Scrape down the sides.
  6. Scrape the batter into the prepared pans, filling about halfway, and smooth with a spatula. Arrange the pans in the oven so that air can circulate around them. Do not allow them to touch each other or the oven walls. Bake 25 to 35 minutes for 6-inch layers [I baked mine for 35 minutes because it was still jiggly at 25]. For 9-inch layers, bake 35-45 minutes. For 12-inch layers bake for 40-50 minutes until a tester inserted near the center comes out clean and the cake springs back when pressed lightly in the center.[Since I'm making 10-inch layers, I'll probably just look at it around 40 minutes and see!] In the 6-inch pan, the cakes should start to shrink from the sides only after removal from the oven. The 10-inch layers should bake until they just start to shrink from the sides. To promote more even baking, turn the 10-inch layers 180 degrees halfway through the baking time. Do this quickly so the oven temperature does not drop.
  7. Allow the cakes to cool in the pans on racks for 10 minutes (15 minutes for 10-inch layers). Loosen the sides with a small spatula and invert onto greased wire racks. To prevent splitting, reinvert and cool completely before wrapping airtight with plastic wrap and heavy-duty foil
  8. When preparing the cake more than 24 hours ahead of serving of if extra moistness is desired, sprinkle layers with cake syrup.

Wednesday 16 July 2008

BIRTHDAY CASTLE CAKE: PART 2...ROYAL ICING IS A PAIN

yes, these castle parts of the birthday cake are plastic. what were you expecting me to do? make everything out of cake? that would be mad mad mad! it's edible...just lick.

here are the fondant flowers finished for now...with lemon yellow centres in royal icing
that's 330 flowers, baby

Now I remember the many reasons why I never want to work as a pastry chef: it's painful.


Making those 330 fondant flowers last night was bad for my neck, my eyes and my patience.

Today, my goal was to make the royal icing (stiff consistency!) and pipe the borders on the castle windows and stuff. I also had to sprinkle the icing with cake sparkles for that glittery (and edible) look that little girls love so much.


To start, I glopped a bit of the royal icing into a bowl (I used Wilton's recipe) and added lemon yellow food colouring. I still had to pipe the centres of those 330 now dried fondant flowers. Since the royal icing was stiff, and I was using a tip 2 (pretty small!), it was quite difficult squeezing. I had to at one point change my squeezing hand because I was getting Carpal Tunnel! And these suckers are so darned small!

The piping of the centres was real grunt work. There's nothing creative about it in my opinion. It just had to be done. Actually, none of the work I find is difficult in this kit. It's just really tedious and can be quite a pain so you ought to make yourself comfortable at a kitchen table with a full glass of wine while you're doing this. While you're at it, pop in some nice jazz. It'll help your stress level. I had to keep reminding myself I was having a lot of fun.

I had a lot of fun.
Really. I did. Mind over matter, right?
I started the flower centres after 9pm and didn't finish until 11pm. So, it actually took me longer to do the centres than it did the cutting and forming of the fondant flowers! This, and the centres were a pain in the neck (and the hand) literally! I suppose I could have thinned the icing, but at this point in the night I was too lazy to squeeze it all out the other end and remix, dirtying yet another bowl. I just wanted to get it over with.
I just went to sleep when it was all done and tightly sealed the remaining icing to save to complete the castle turrets and roof the next morning while the baby was asleep.
refreshed after a night's sleep, i complete the icing & sparkling of the castle parts

If you're a mom or dad, I'm sure you've had a blue tongue at one point in time. You've been to those kiddie birthday parties with the frosting coloured black, blue and red for boys or pink, violet and green for girls.

Ghastly.

The main attraction for the kids are the Disney characters sitting on top of the cake. Unfortunately, I too have bowed to the commercialism here because what Bebe wants for her cake is what she gets. In this case, you'll have to guess the theme. I'm not telling yet. However, here's one hint: I've coloured my icing teal blue! ick!

i know it doesn't look it, but cake sparkles are edible. really! not tasty, but edible.

The next day, to begin, I had to add a touch of water to my royal icing as it sat overnight. I gave it a good re-mixing and used a little spatula to ice the "cones" and I used a Wilton tip 3 for the windows on the turrets, the borders of the doors and the other castle windows. I had to do them individually and then sprinkle the cake sparkles on them quickly; otherwise the royal icing would harden and the sparkles wouldn't stick. I used a medium-sized bowl to catch all the sparkles and spooned them over the icing repeatedly until they stuck well.


All this work and I haven't even begun to bake the chocolate layers yet.

My to-do list:
  • bake double layers for a 6" and 10" cake
  • buttercream icing for both layers
  • prepare for stacking (dowels for structure)
  • add the castle kit parts to the iced cake (more dowels for stability!); try to make it look castle-like
  • decorate with buttercream and the fondant flowers

whew!

Bebe watched me sprinkling sparkles and whispered to me that she really appreciated my making her this cake. She gave me a kiss on the cheek and said she'd help me vacuum up the little icing bits and sparkles on the table and she did this intermittently throughout the hour that it took me to ice the castle parts. Clean-up was a breeze with her assistance! What a good helper for a 4 year old (ahem. excuse me...almost 5 year old). She turned to me with the dust-buster in hand and said, "and mommy, do you appreciate me vacuuming the mess you made?"

I replied the only reason I was making this monstrous cake was because she wanted it. Cue violin music--and canned reassuring parental phrases: "you know I love you and I appreciate what a great job you're doing!" [hug, kiss, smile, pat on back] Sounds corny and insincere but it's true and it's what they need to hear!

And that my friends, is why I go through the bother. Actions speak louder than words. In this case, castle cake speaks volumes of the lengths I'll go to make her happy.

I only hope that Bib doesn't ask for the same thing when she's older! When I'm done, I'm going to hide the kit somewhere where it'll never be found again: in my crafts closet--no-man's land.

Tuesday 15 July 2008

BIRTHDAY CASTLE CAKE: PART 1...FONDANT FLOWERS

Part 1: Fondant Flowers
9:oopm: kids are in bed asleep and I've assembled all my flower-making tools: decorating tool kit, wet towels, dry towels, spatulas, fondant rolling pin and board, cornstarch duster, flower ejector and camera!


i was taught to take a small bit of the fondant and knead in the food colouring. this controls the shade of colour you create in the end
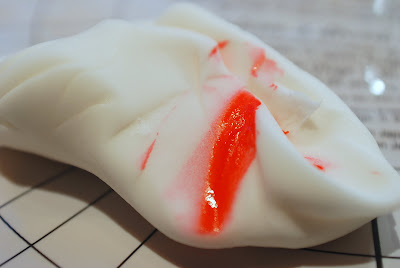
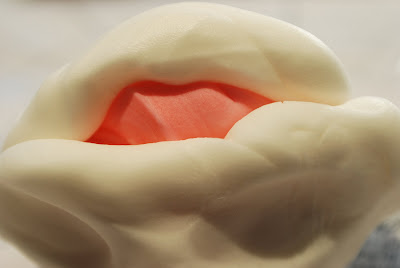
9:15: it took about 10 minutes to knead 8 ounces of white fondant with pink gel paste food colouring into a complete mass of pink. then, you take the small pink chunk you've kneaded and add it to the remaining larger chunk of white fondant and knead these two together. is it past my bedtime? or does this picture look obscene to you too?

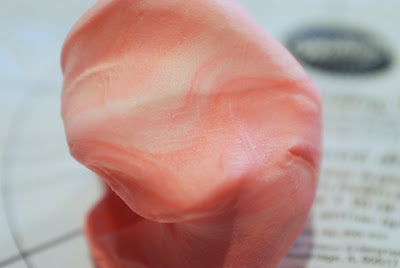
it may take a while for you to get from the marbleized colour to thoroughly mixed if you have a huge chunk of fondant that you're colouring. this one's not ready yet.


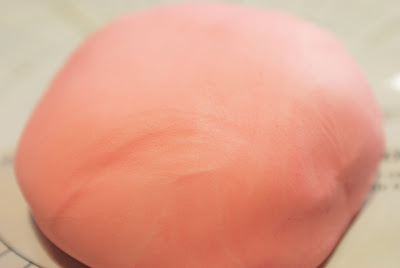
at last, the food colouring has been thoroughly kneaded into the fondant

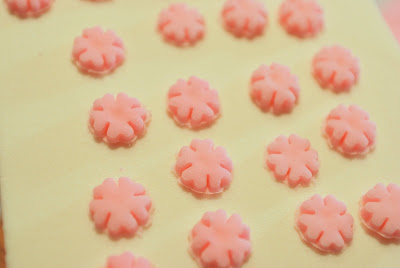
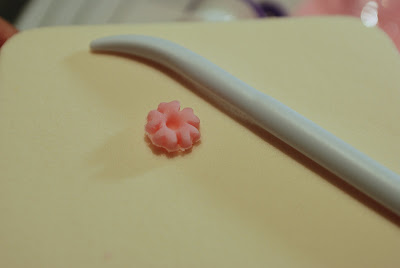
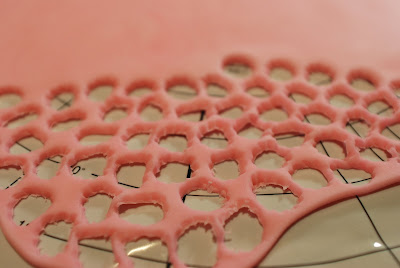
9:30 pm: OMG! this is tedious and my back's killing me. I decide to sit down at the kitchen table to make the flowers. I begin to gain a rhythm and start cutting the flowers a batch at a time, resting them on the foam block. I then use the dowel to shape the flowers all at once and then place them to dry on my parchment-lined sheet pan.


here are the little cut out flowers awaiting shaping on the foam


using the little dowel, you just gently press the tip into the centre of the fondant flower, creating some dimension


look at all the cutouts i made and i'm not even half done yet!


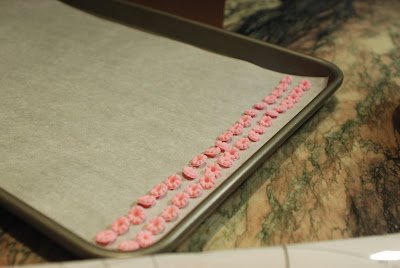
i lined up the little pink flowers to dry on parchment. i decided to make rows of 20 because it would make it easier to keep track of how many i had made. i need to make 285 flowers plus extras for breakage!


i'll be adding royal icing centres to these little fondant flowers the next day


ahh. finished at last. in the end, i made 330 of these little suckers

10:45 pm: done for now! off to bed!


Monday 14 July 2008

MINI VANILLA BEAN CRANBERRY ENGLISH SCONES

vanilla bean cranberry english scones

cold cubed butter is vital to a flaky scone
dried cranberries are a deliciously slightly tart addition to this scone mixture
the scone dough looks good enough to eat raw!

I made some delightful scones the other day to go with the huge batch of strawberry jam I have. I used Yard's recipe for traditional English scones. I concur with Yard about the size of scones. In North America, they're obscenely huge and taste kind of dry and doughy. I like them small and with clotted cream (if you can get it) and homemade preserves. I adapted her recipe and added vanilla bean seeds to the dough and kicked it up with some dried cranberries.

I'm kind of pressed for time, so I won't post the recipe today. If there's significant interest out there, just leave a comment and I'll do it.

*****

Today is Day 1 of my challenge to complete Bebe's 5th birthday cake.

I foolishly opened my big trap and promised her I'd bake her any kind of cake she wants.

Bebe, in her princess stage still, asked for the Cover Page cake on the Wilton 2008 magazine we saw at Michaels. My mouth dropped. I offered to make her one of those character-shaped cakes instead.

She shook her head and said I could do it. She was adamant that I make her the Romantic Castle Cake. She wanted the cake itself to be chocolate and she wanted some pink in it too. So I used as many coupons as I could over the course of 2 months preparing for this day. I purchased the cake kit with the coupon, bought fondant premade because the cake itself was daunting enough without having to make fondant too, and started collecting all the elements I would need to complete this humongous 2-tiered behemoth of a kiddie cake.
I wanted to do much of the decorative elements in advance and so, with one week to go, I will be starting the over 285 mini fondant flowers that I have to make by hand. Yup. you read right: 285 PLUS additional in case of breakage. I'm sure breakage will happen...at 11pm with my eyes crossed, hair covered in confectioners' sugar, fingers crusted with the sticky fondant and my whole kitchen a mess of dirty bowls stained with pink, green and blue food colouring.

I may try to take pictures tonight of those flowers...we'll see what kind of a mood I'm in. I really can't start making any of these things until both kids are asleep. So I'll start some time after 8pm I think.
**********
August 8, 2008 update
This is for Kassandra:
As requested, I'm posting the recipe I used for these mini scones!
MINI VANILLA BEAN CRANBERRY ENGLISH SCONES
(adapted from Yard's "Traditional English Scones" in Desserts by the Yard
2 cups all-purpose flour
1/4 cup sugar, plus more for sprinkling (optional)
1/2 teaspoon baking soda
1/2 teaspoon cream of tartar
1/8 teaspoon salt
4 oz (1 stick) cold unsalted butter, cut into 1/2 inch pieces
1 tablespoon grated orange zest [i omitted this from my recipe]
1 vanilla bean pod: scrape out seeds and set pod aside for alternate use (vanilla sugar!) [Yard doesn't use vanilla at all]
1 large egg
1/2 cup heavy cream, or more as needed [Yard uses half cream and half milk]
1/3 cup dried cranberries (craisins) [Yard uses raisins...I don't like raisins but craisins are great!]
milk for brushing
  1. Place racks in the upper and lower thirds of the oven. Preheat the oven to 400°F. Line two 12 x 17 inch half sheet pans with parchment paper.
  2. Sift together the flour, sugar, baking soda, cream of tartar, and salt into the bowl of a stand mixer fitted with the paddle attachment. Add the butter and zest if using and vanilla seeds and mix on low speed for 1 minute, until the butter and flour are broken down into pieces the size of walnut meats. Use your thumb and forefinger to flatten the "walnuts". Then take up the mixture and rub briskly between your hands.
  3. In a separate bowl, whisk together the egg and cream. Add to the flour mixture along with the craisins and blend at low speed just until the dough comes together, about 10 seconds. If it seems dry, add a bit more cream, a tablespoon at a time
  4. Line your work surface with parchment, dust the parchment with flour, and scrape out the dough. Shape into an 8-inch square, about 1 inch thick. You can use a rolling pin for this. Cut the dough into 2-inch squares. If making triangles, cut the squares in half on the diagonal. [in my recipe i cut 32 mini triangles] Flip the scones over and place on the parchment-lined pans. Brush with milk (or cream) and sprinkle with sugar if desired.
  5. Bake for approximately 15 minutes, until dark golden brown and puffed.

Thursday 10 July 2008

I SCREAM, YOU SCREAM, WE ALL SCREAM FOR CHOCOLATE CHIP COOKIE ICE CREAM SANDWICHES

Have you ever seen a kid crying while eating ice cream?chocolate chip cookie vanilla bean ice cream sandwich

No! Never during eating. Maybe crying before and maybe after, but not during eating ice cream.

It's nearly impossible to be unhappy when you're eating ice cream, whether it be on a cone, in a bowl or my favourite: shmudged between two freshly baked chocolate chip cookies! mmmm
I dare you to eat one of these babies and stay mad or unhappy.

Bebe was smiling fierce while she was eating this ice cream sandwich.
Until I heard a thud. Then it was this high-pitched wail and real tears. Nothing's so sad as a kid with dropped ice cream. The sandwich was so thick, she had problems biting into it but she was doing quite well until the drop. She was inconsolable until I made her another one.

a pretty darned good cookie. but i'm not committing myself to saying it's the best
here's the cookie's innards. i used callebaut dark chocolate chunksi adapted yard's recipe and tossed in some coarsely chopped lightly salted, roasted almonds into half the dough. way better!

I'm ready, willing and able to commit myself to researching the best recipe for chocolate chip cookies. Of course, there are those who love crispy and chewy cookies and there are those that like cakey cookies. I think there might even be a few who like crunchy cookies. I like mine underbaked slightly so that they stay soft in the middle. I do like a crispy and chewy cookie too. The cookies I don't really like are those "Dad" cookies you buy in the supermarket. Narey a chip to be seen and when you taste it, it's akin to dirt. Crunchy, yes...but dry and not very chocolatey. The chocolate chips are waxy and not so sexy. They're little specks, nubbins in a vast plain of blahness.

For my decadently yummy ice cream sandwich, I decided to use Yard's "Quintessential Chocolate Chip Cookie" recipe. I like my Toll House recipe very much and haven't strayed too far from it. Yard's is very close to the Toll House recipe. I also have a recipe I like to use sometimes to make huge cookies that resemble the ones you get at the mall. It's from my Professional Baking cookbook, by Wayne Gisslen and it requires bread flour. It's one of my favourites. Apparently, Alton Brown makes a chocolate chip cookie using melted butter, but I haven't tried the recipe yet. I have it on queue...

CHOCOLATE CHUNK COOKIE VANILLA BEAN ICE CREAM SANDWICHES

(adapted from Sherry Yard's "Quintessential Chocolate Chip Cookies" in Desserts by the Yard)

  • 1 1/2 cups all-purpose flour
  • 1/2 t baking soda
  • 4 oz (1 stick) unsalted butter, softened
  • 1/2 cup sugar
  • 1/2 cup packed light brown sugar
  • 1/4 t salt
  • 1 large egg
  • 1 t vanilla extract
  • 12 oz bittersweet chocolate, cut into 1-inch pieces
  • vanilla bean ice cream [any kind will do, but homemade is always best!]

NB: I divided the dough in half and added coarsely chopped lightly salted roasted whole almonds to one batch. This improved the cookies in that the bit of extra salt and the crunch of the almonds gave the cookies more flavour and a wonderful texture!

  1. Place racks in the middle and lower third of the oven and preheat the oven to 350 degrees F. Line baking sheets with parchment paper.
  2. Sift together the flour and baking soda and set aside.
  3. In the bowl of a stand mixer fitted with the paddle attachment, or in a large bowl with a hand mixer, cream the butter on medium speed until lemony yellow about 2 minutes. Scrape down the sides of the bowl. Add the sugar, brown sugar, and salt. Continue creaming the mixture on medium speed until it is smooth and lump-free, about 1 minute. Stop the mixer and scrape down the sides of the bowl and the paddle.
  4. Add the egg and vanilla and beat on low speed for 15 seconds, or until the egg is fully incorporated. Do not overbeat. Scrape down the sides of the bowl.
  5. On low speed, add the sifted flour mixture. Beat slowly until all of the flour is incorporated. Scrape down the sides of the bowl. Add the chocolate chunks and mix in.
  6. Remove small handfuls or spoonfuls of one half of the dough from the bowl and center them along the bottom of a sheet of parchment or waxed paper, creating a log about 1 1/2 inches wide and 12 inches long. Fold the parchment over, creating a sausage. Twist the ends over and wrap in plastic. Repeat with the remaining dough. Chill for at least 1 hour, preferablly overnight. (The dough can also be frozen, well wrapped, for up to 2 weeks.) When the dough has chilled, remove it from the paper, and using a serrated knife, slice 1/3 inch-thick rounds off the log. Place the cookies 2 inches apart on the prepared baking sheets. (To bake the dough without chilling, spoon heaping tablespoons 2 inches apart on the prepared baking sheets)
  7. Bake, rotating the sheets from top to bottom and from front to back halfway through the baking, for 12 to 15 minutes, until lightly browned. Remove from the oven and slide the parchment off the baking sheets onto a work surface. Cool the baking sheets between batches. Allow the cookies to cool for at least 5 minutes before serving, or allow to cool completely before storing in an airtight container. (They will keep for up to 3 days at room temperature.)

*cakebrain's ice cream sandwich hints: soften the ice cream a bit before scooping balls between the cookies. Wrap well in plastic wrap and store in the freezer. They won't last long!

Recipe Taste-rating: Good cookies. Better with those almonds. Very good with the vanilla ice cream. They're of course best on the day of baking. Still soft 3 days later.


Wednesday 9 July 2008

NUTS! I FOUND THE PERFECT SNACK FOOD

gourmet nut blend: macadamias, hazelnuts, papaya, mango, cilantro, cumin and chipotle

Hey, you know I like to snack. It isn't often that you'd find me without one on my person...in my purse, in the top left drawer of my desk in the classroom amidst the bags and cans of green tea (I keep it locked so don't bother!), in my pantry and in my car.

This isn't even counting the myriad snacks I keep around for my kiddies (rice crackers and pretzels etc.)!

It's like I've got to eat, ya know?


I find roasted, unsalted almonds to be a great energy lifter so they're always around in a little fist-sized tin in my purse. I try not to keep processed junk around because if it's there, I'll overindulge. So for me, that crucial choice not to purchase the junk at the grocery store is key.

pecans, cranberries, orange zest and black pepper blend

One place I feel kind of safe buying snacks, is at a whole foods store. Today I went to Capers, though I'm looking forward to the new Whole Foods opening soon on Broadway and Cambie. I can't wait! I found these delicious nuts at Capers today. They come in a variety of "gourmet" flavours. Looking at the ingredient list, I'm cogitating: how the heck am I gonna make these? They're so expensive! ( but they're so good! Tell me if you have a good knock-off recipe!)

Sahale (sa-HA-lee) has 6 different "blends" of nuts:
  • Dauphine: walnuts with blueberries, banana, coconut, ginger & lavender--lightly sweetened and seasoned with white pepper
  • Ksar: pistachios with sesame seeds, pepitas, fig & moroccan harissa sweetened by honey & kicked up with pepper
  • Sing Buri: cashews with pineapple, peanuts, lemongrass, mild chinese chili
  • Socorro: macadamia nuts with hazelnuts, mangos, papaya & seasoned with cumin, cilantro, southwestern chipotle
  • Soledad: almonds with apple, flax seed, dates, balsamic vinegar & cayenne
  • Valdosta: pecans with cranberries, black pepper & orange zest
I purchased the "Socorro" macadamia blend and the "Valdosta" pecan blend. There is a definite sweetness to both blends. I much prefer the flavours in the macadamia blend (not so crazy about the inclusion of hazelnuts though) but the pecan blend has a nice kick to it too. I think all the blends have the sweet, salty, spicy thing going on and it appeals to me on so many levels! I'm rationalizing eating these because they're considered "whole foods".

The Sahale website is here if you want to check out the products and ingredients. From the names of the blends, I thought that this company would be more ethnic, but they're not. Looks like a couple of white guys trying to make it big like Starbucks. They're based in the Pacific Northwest, in Seattle Washington. Check out this link if you want to find out the story behind the names of their snack blends, and how to pronounce them!


I've seen the pecan blend for sale in a huge bag at Costco and was very intrigued; but afraid to buy such a huge quantity without having sampled it. I'm glad I didn't buy it because I prefer the macadamia blend. That being said, Costco's price for the huge bag is so much cheaper than the little itty bitty 142g bag I bought for around $5! Oh well, that's a good reason for moderation.

taste-rating: two thumbs up!

****

update: August 4, 2008

psssst! I've created my own knockoff recipe over here!


LinkWithin

Related Posts Widget for Blogs by LinkWithin