Friday, 28 March 2008

BLACK SESAME PUDDING CUBES

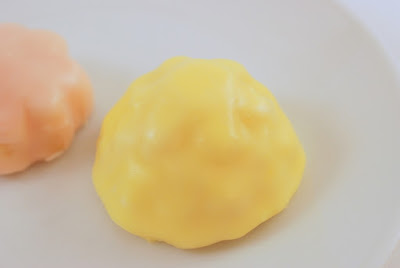
nine-layered black sesame pudding cubes

Have you ever had "Nien Goh"? It's the Chinese New Year's rice pudding cake that's steamed. This Black Sesame Pudding recipe is similar to the New Year's rice pudding cake in many ways. The base is rice flour and sugar and it's steamed. In fact, it's steamed in layers...9 layers in all. In the picture, you can see at least 8 layers. My ninth layer is kind of thin and doesn't show up very well. But it's there!

This recipe yielded a pudding that was not as chewy or tender as I would have liked. I wanted to replicate the Black Sesame puddings you get at Dim Sum. This one was more dense and very filling. After one cube, I was done and wanted to go to take a nap.


The black sesame flavour was pretty good, but perhaps this pudding is best eaten warm and fresh. After refrigeration, the pudding became harder and wasn't as pleasant to eat cold. I hadn't tried resteaming the pudding after it was refrigerated, but it's worth a try to bring back the texture. I don't think I'd make this one again. I couldn't eat more than one cube because it was so filling.

BLACK SESAME PUDDING

(from Distinctive Snacks of Hong Kong)
1 1/2 oz (40 g) black sesame
8 oz (225 g) castor sugar
3 1/2 cups water
7 oz (200 g) rice flour
2 oz (50 g) waterchestnut flour
1/2 T oil

  • Rinse, drain and air-dry the black sesame. Stir-fry in dry clean wok until golden brown. Grind in 6 oz(200 ml) water. Put through a sieve to form a fine solution.

  • Dissolve castor sugar in 6 oz (200 ml) water

  • Mix rice flour and waterchestnut flour with 2 cups (500 ml) water. Add oil and mix.

  • Add the above 3 items together, mix well. Pour a thin layer of mixture to about 1/2 cm thick in a square tin. Steam over high heat for 3 minutes until set.

  • Remove wok lid, pour in a second layer of mixture, steam for another 3 minutes. Repeat this process for 9 layers and then steam the whole pudding for 20 minutes.

  • Remove from heat. Cool, unmould, slice and serve.

  • Tip: mix sesame solution well before steaming.

Tuesday, 25 March 2008

SUPERSIZED SUSHI: GIGANTIC CALIFORNIA ROLLS


Have you ever had a craving for sushi?

I was at the local market handling a perfectly ripe avocado when the craving hit. I immediately added the avocado to my basket along with some of that fake crabmeat (surimi) made out of pollock. A fish with such an unappealing name surely needs to be processed into something else.

I had a 5-sheet package of "fancy" grade sushi seaweed in my cupboard at home, some Kokuho Rose brand sushi rice, a bottle of seasoned rice vinegar, and that weird Japanese mayonnaise in a squeeze bottle (Kewpie mayonnaise). Those are the makings for California Rolls!

Here's my recipe--actually I don't really use a recipe, I just kind of wing it, but this time I measured for your sake!


JUMBO CALIFORNIA ROLLS
these ingredients are the basics for a California Roll but you can kick it up a few notches by using the optional ingredients

3 cups cooked short-grain rice (white or brown) [I used Kokuho Rose brand]
1/4 cup seasoned rice vinegar [this comes prepared in a bottle]
2 cups surimi (fake crabmeat)
1 ripe avocado, sliced
1 package sushi seaweed [I used a fancy grade 5-sheet package--the more expensive the seaweed generally, the tastier it is]
optional: these ingredients will definitely make your rolls tastier!
julienned English cucumber, tobiko for garnish, toasted sesame seeds, real crab meat
This is surimi. I know it's fake, but it's delicious!
You can substitute real crab meat if you're made of money. But if I were you, I'd rather splurge on the seaweed.
  • In a large bowl, combine the seasoned rice vinegar with the hot cooked rice. Set aside to cool. Toss gently occasionally.
  • Using a bamboo sushi mat, lay the roasted sushi seaweed glossy side down. Usually there are little indentations on the seaweed--these should run vertically on the mat.
  • Spoon about 1 cup of the cooled seasoned sushi rice onto the seaweed. Spread the rice evenly over the seaweed. I often use a little paring knife to help me spread...I know, it's not orthodox but it keeps my hands from getting sticky! Real sushi chefs wet their hands in clean water continuously so the rice doesn't stick. They just use their hands to spread the rice.

  • Take whatever filling you desire and line it up along the bottom edge of the seaweed/rice mat. Of course if you use other fillings, you won't have a California roll. I've used canned salmon or tuna, cucumber, cooked egg (scrambled), red peppers, teriyaki shitake mushrooms and the list goes on and on. Pretty much anything goes. If you want, you don't have to use raw fish at all. At this point, you can also add the mayonnaise or other thick sauces as well.

  • Using the bamboo mat, roll the sushi away from you. Use the mat to help press close the roll.

  • Slice the sushi rolls with a sharp knife. It helps if you clean the knife sporadically. Often, with the larger rolls, I use a serrated bread knife to cut the rolls. It helps avoid crushing the rolls (I know! also unorthodox and not very Japanesey--I'm not Japanese!) It works. Take my word for it. You won't have smushed rolls.

  • Serve with a high grade soy sauce for sashimi/sushi. I like Yamasa. Kikkoman is good too. Pickled ginger and wasabi will only make it better.

Wednesday, 19 March 2008

TENDER ALMOND SCENTED MADELEINES

almond scented madeleines


After the resounding success of the Marshmallow Fluff-filled Bittersweet Chocolate Ganache-dipped Chocolate Madeleines with all my tasters, I thought it would be appropriate to go back to the basics and try a traditional madeleine recipe again.
In my Williams Sonoma: Essentials of Baking cookbook, I found a simple batter that yielded the most tender madeleine ever. I adapted the recipe to be lightly scented with almond and it tasted superb even 3 days later! I simply popped the madeleines in a toaster for a light warming and they tasted fresh again! These are the types of madeleines made for dunking a la Proust. I particularly enjoyed the tender crumb of these cakes and intend to make it again and again.


this madeleine recipe is my favourite so far because of its ethereal almond scent and tender crumb

Almond Scented Madeleines

(adapted from "Orange Madeleines", Williams Sonoma: Essentials of Baking)

2 large eggs
1/3 cup (3 oz/90 g) granulated sugar
1/4 t salt
1/2 t vanilla extract
1/4 t almond extract [I used 1/2 t almond extract]
1/2 cup ( 2 1/2 oz/75 g) all-purpose flour, sifted
1 t grated orange zest [I omitted this]
1/4 cup )2 oz/60 g) unsalted butter, melted and cooled

  • Position a rack in the middle of the oven, and preheat to 375degrees F (190degrees C). Using a pastry brush, heavily brush room-temp. butter over each of the 12 molds in a madeleine pan, carefully buttering every ridge. Dust the molds with flour, tilting the pan to coat the surfaces evenly. Turn the pan upside down, tap it gently, and discard the excess flour. [I used baker's spray and did away with all of these steps! ;p ]
  • In a large mixing bowl, combine the eggs, granulated sugar and salt. Beat on medium-high speed about 5 minutes. Beat in the vanilla and almond extracts. Sprinkle the sifted flour over the egg mixture and mix on low speed to incorporate.
  • Using a rubber spatula, gently fold in the orange zest [I omitted this] and half of the melted butter just until blended. Fold in the remaining melted butter.
  • Divide the batter among the 12 prepared molds, using a heaping tablespoon of batter for each mold. Bake the cookies until the top springs back when touched, 8-12 minutes [mine took 15-18 minutes].
  • Remove the pan from the oven and invert it over a wire rack, then rap it on a rack to release the madeleines. If any should stick use your fingers to loosen the edges, being careful not to touch the hot pan, and invert and rap again.
  • Let cool on the rack for 10 minutes. Using a fine-mesh sieve, dust the tops with confectioners' sugar and serve [I didn't need the confectioners' sugar...besides I couldn't wait to taste one]. Alternatively, cover with plastic wrap and store at room temperature for up to 3 days. Before serving, heat the cookies in a 250degreeF (120degree C) oven until warm, then dust with the confectioners' sugar.

Tuesday, 18 March 2008

MARCH MISSION ACCOMPLISHED: SPRING PETITS FOURS

Sugar rushhhhh!
spring petits fours

seedless raspberry jam sandwiched in the petits fours


a platter of these petits fours would be perfect for a dainty tea party. yup, i've munched two of the cakes in the foreground. i couldn't wait!


These darling Spring Petits Fours are so sweet I had to chase them down with a couple of glasses of water! They are enrobed in an icing made of confectioners' sugar. The recipe called for a kilogram of confectioners' sugar and I thought that a bit much for the quantity of cakes, so I halved the recipe for the icing. In the end, I still had plenty of icing left over. Mind you, I scraped the dripped icing from the sheet pan I had under the rack of petits fours and reused/repoured it over the remaining cakes. I didn't encounter any problems with my technique so I'm glad I saved myself some ingredients. I hate to waste.


For half of the petits fours, I sandwiched seedless raspberry jam. These little raspberry ones were even sweeter. whooeey! I think if you were to have ONE of the cakes with tea or coffee it would be fine. I'm not too fond of royal icing or this poured icing glaze. All I taste is sugar. It makes me want to brush my teeth right away.


As for the performance of the cool flower cake mold...it's a winner! I sprayed it with baker's spray beforehand and the little petits fours popped out no problem! I'd like to figure out a way of employing the spring flowers petits fours mold for making something else. Maybe brownies? Financiers? hmm. I just don't like the icing. Unfortunately it's the icing that makes it look so pretty! The little cake part was good by itself. Yet again, a dessert that looks pretty but doesn't rock my tastebuds. I think I would use this pan again, but perhaps I'd look for an alternative to this icing. Perhaps a thinner coating of icing or better yet, a coating of white chocolate tinted in pastel colours! yeah! That would be a winner, I'm sure! I'm trying that next.


Check out the recipe here.

Wednesday, 12 March 2008

MARSHMALLOW FLUFF-FILLED BITTERSWEET CHOCOLATE GANACHE-DIPPED CHOCOLATE MADELEINES

marshmallow fluff-filled bittersweet ganache-dipped chocolate madeleines

What a mouth-full! Will these madeleines trigger an involuntary memory in Proustian fashion?

These chocolate madeleines from Dorie Greenspan's cookbook Baking: From My Home to Yours, were quite easy to make. The hardest part was waiting for the batter to rest in the refrigerator for a minimum of 3 hours. After the requisite 3 hours, I took it out and proceeded to scoop it into the prepared madeleine pan.

Geez it was a stiff batter! It was the consistency of a cookie dough. I thought it was supposed to be more like a cake. My previous madeleine attempts with other recipes did not yield such a thick dough. I should have formed the batter into little oblong balls. I just plopped them raggedly from the spoon, thinking that the batter would just melt into the grooves of the pan.

No way. The batter didn't melt. Some of the baked madeleines were kind of lumpy and ragged-looking at the edges. These were the ones that I had not as neatly formed with a spoon. That being said, I guess it doesn't really matter in this case because I was going to stuff and dip them anyway.

It's always nice to have pretty-looking naked chocolate madeleines too though.

Bebe scarfed down her freshly-made madeleine. The marshmallow fluff was miniscule... I would have liked more filling in there. I was hoping for a ding-dong-sized portion of filling. Oh well. Next time I'll try to ram more filling in. The baked madeleines are pretty dense though and were not easy to fill so I suppose I'd have to dig out some of the interior to get more space for filling!

individually nestled in cupcake liners & ready to go to work tomorrow for sharing with staff!

Sorry for the overexposed pictures. It was late at night and I was too tired to take my madeleines down to my cardboard box food-porn "studio" for proper lighting! neah.

Here's the recipe if you're so inclined.

Fluff-filled Chocolate Madeleines

from Dorie Greenspan's Baking: From My Home to Yours


For the Madeleines
2/3 cup all-purpose flour
1/4 cup unsweetened cocoa powder
1/2 t baking powder
pinch of salt
2 large eggs, at room temperature
1/2 cup sugar
1/2 t pure vanilla
3/4 stick (6 T) unsalted butter, melted and cooled

Marshmallow fluff, for filling and frosting

For the Dip
4 oz bittersweet chocolate, finely chopped
1/2 cup heavy cream
1 1/2 T unsalted butter, at room temperature

To Make the Madeleines:
  • Sift the flour, cocoa, baking powder and salt together
  • Working with a stand mixer fitted with the whisk attachment or with a hand mixer in a large bowl, beat the eggs and sugar together until pale and slightly thickened, about 3 minutes.
  • Beat in the vanilla extract, then switch to a rubber spatula and gently fold in the sifted dry ingredients, followed by the melted butter.
  • Put a piece of plastic wrap directly against the surface of the batter and refrigerate for at least 3 hours or for up to 2 days. Chilling the batter gives you a better chance of getting the characteristic hump on the back of the cookies.
  • Centre a rack in the oven and preheat the oven to 400 degrees F. Generously butter 12 full-size madeleine molds, dust the insides wiht flour and tap out the excess. Butter and flour or spray the pan even if it is nonstick; skip this step if you are using a silicone pan. Place the pan on a baking sheet.
  • Spoon the batter into the molds.
  • Place the pan in the oven and immediately lower the oven temperature to 350 degrees F. Bake the cookies for 13 to 15 minutes, or until they feel springy to the touch. Remove the pan from the oven and rap one side of the madeleine pan against the counter--the plump little cakes should come tumbling out. Gently pry any reluctant cookies out with your fingers or a butter knife. Cool to room temperature on a rack.

To Fill the Madeleines:

  • Fit a small pastry bag with a small plain tip and spoon the fluff into the bag. Use the point of the tip to poke a hole in the rounded (plain) side of each madeleine, and pipe enough fluff into each cookie to fill it--stop when the fluff reaches the top of the cake. (You'll use only a bit of fluff).

To make the Dip:

  • Put the chocolate in a small deep heatproof bowl. Bring the heavy cream to a full boil, then pour it over the chocolate. Wait for 1 minute, then gently whisk the cream into the chocolate: start at the centre and slowly work your way out in concentric circles until you have a smooth, shiny mixture. Gently whisk in the butter.
  • Line a small baking sheet with wax paper. One by one, hold a madeleine at its narrow end and dip it into the chocolate, then lift it up, let the excess chocolate drip back into the bowl and place smooth side down on the wax paper. Slide the baking sheet into the refrigerator to set the glaze, about 15 minutes (You'll have more ganache than you need, but making a larger quantity produces a better ganache. The leftover dip can be covered and refrigerated for 1 week or frozen for up to 1 month.)
  • If you'd like, pipe a little squiggle of fluff on the top of each madeleine once the chocolate is set.

Thursday, 6 March 2008

PICHET ONG'S CONDENSED MILK POUND CAKE

ong's condensed milk pound cake

I was recently visiting Cakewardrobe's blog and noticed she baked Ong's Condensed Milk Pound Cake. Her post reminded me of the little flag I stuck on the recipe in my own copy of Ong's book. It's been there a while but now that I've seen her scrumptious results, I was motivated to make the cake.
the pound cake cracks a smile

I had all the ingredients on hand. I love condensed milk so it's always kicking around. The best brand of Condensed milk is the one with a picture of that old guy on the front. That's the Longevity Brand, I think.
I didn't follow the recipe exactly. Of course.

I buzzed up a whole vanilla bean in my Bullet. Then I proceeded to dump everything into my trusty Kitchenaid. I didn't want to lug out my food processor. Ong makes the whole cake in the processor but I find it a hassle to clean the processor lid so I'm always reluctant to use it for stuff like this.

I beat the butter and salt first, then added the ground vanilla bean sugar. I made sure it looked nice and fluffy and then added the flour mixture and the eggs and poured it into the loaf pan.

Here's where Ong's recipe goes awry. His timing's way off. I don't know if he used convection mode or not but he states to bake the pound cake for about an hour. I kept checking the cake and at 60 minutes, it was light golden and jiggled in the middle. I added 5 minutes and it still didn't look done. By the time it was done, I had added a full 20 minutes onto the 60. Looking at the illustration in the cookbook, it appeared the pound cake was quite brown externally. It was not golden brown by my standards. My pound cake was not brown, but it was a tad past the dark golden stage.

the crunchy, caramelized crust is the best part
love those vanilla bean specks

The cake was perfect in every way. The crust was crunchy and sweet. It almost tasted deep-fried! The crumb was fine. The cake had a subtle condensed milk flavour. I loved the specks of ground vanilla bean in the cake. I hadn't even bothered sifting it like Ong indicated in the recipe. I like a few bitty chunks of vanilla in there. The Bullet is able to get the vanilla pod ground up quite fine.
because i didn't sift the ground vanilla sugar, i had tiny vanilla bean chunks throughout: bonus!

Stomach loves the pound cake. Bib and Bebe loved it too. It's a keeper and I highly recommend it. However, if I were you I wouldn't bring the cake out of the oven too quickly. Ong's timing is way off.

CONDENSED MILK POUND CAKE
from Pichet Ong's Sweet Spot
[my adaptations to the recipe & techniques are in brackets]
Makes one 8 1/2 -x- 4 1/2 inch cake, about 12 servings
1 cup (8 oz/226 g unsalted butter, at room temperature, plus more for greasing the pan
1 1/3 cups (7 oz/200g) all purpose flour
3/4 tsp baking powder
1/2 cup (3 3/4 oz/ 106g) sugar
1 vanilla bean, chopped, or 2 tsp vanilla extract
1/2 tsp salt
3/4 cup (8 oz/239g) sweetened condensed milk
3 large eggs
  • Preheat the oven to 325° F.
  • Generously butter an 8 1/2 x 4 1/2 - inch loaf pan and set aside.
  • Sift together the flour and baking powder and set aside.
  • Put the sugar and the chopped vanilla bean, if using, in the bowl of a food processor fitted with the metal blade and pulse until the vanilla bean is finely ground. Sift through a fine-mesh sieve and return the sugar mixture to the food processor. If not using the vanilla bean, just put the sugar in the processor. [I buzzed the sugar and vanilla bean in my Bullet]
  • Add the butter and salt and process until light and fluffy, about 2 minutes, scraping down the sides and bottom of the bowl occasionally. Add the condensed milk and pulse until well incorporated, about 15 times, scraping down the sides of the bowl once. [I used the stand mixer and the beater attachment to beat the butter, salt and ground vanilla sugar mixture until fluffy. Then I added the condensed milk and beat until combined]
  • Add the sifted dry ingredients and pulse until no traces of flour remain, about 10 times. Add the eggs and pulse just until combined, about 5 times. Scrape down the sides and bottom of the bowl, add the vanilla extract, if using, and finish mixing by hand to fully incorporate the eggs. [Add the dry ingredients to the mixing bowl and beat until combined. Then, add all the eggs and continue beating until thoroughly incorporated.]
  • Transfer the batter to the prepared loaf pan. Bake until the top is dark golden brown and a tester inserted in the center comes out clean, about 1 hour. Cool completely in the loaf pan on a rack, then unmold. [I baked my pound cake for one hour 20 minutes!]

Saturday, 1 March 2008

MARCH 2008: SPRING RECIPE MISSION...TO MAKE PETITS FOURS

Hey, how many kitchen gadgets and specialty baking pans do you have stashed away at home unused?

I am ashamed to say that I don't have the time--though I do have the inclination--to make use of the stockpile of cake tins, molds and pans I have purchased over the years. I even have an authentic okonomiyaki pan from Japan which my dear friend J-11-hamburgers-"Kobayashi" mailed to me in Vancouver (it was cast iron. yikes!)

For the month of March and from now on, I promise I will endeavour to make use of the cool gadgets, the nifty bakeware and specialty tools I have squirreled away for so long in various parts of my house.

For March, I'm going to try and make Petits Fours in the Nordicware pan I purchased a while ago at Williams Sonoma. Yes, shame shame on me for not having done anything with it for so long. The little intricate flower molds are so beautiful and I was told by the salesperson that she had one and her petits fours turned out very well. The pan mold is so pretty you could display it.

The Nordicware pan comes with a recipe and I intend to try it out because it should fit the capacity of the pan quite well and I won't have to dicker around with locating a suitable one. It even has an icing recipe too which calls for 8 cups of confectioners' sugar! I'll have to head out to buy some and stockpile the confectioners' sugar as I don't think I have enough right now.

These look perfect for a spring tea party. I really ought to have a "High Tea Party". It's such a civilized thing to do! I can't wait until my little girls are both big enough to come with me to my favourite place for High Tea in Vancouver, The Secret Garden Tea Company in Kerrisdale. They provide a 3-tier plate where the bottom two plates are filled with little finger sandwiches, and mini savouries, English scones with Devon cream and raspberry jam. The top plate is a selection of desserts, cakes and other such sweets. Each person has their own personal tea pot with their choice of loose tea. They have a huge selection of teas from which to choose.
Let's just say I rarely see the male of the species sitting in this room. It's a very dainty place where ladies meet with their girlfriends for birthdays and showers; where women take their grandmothers and daughters and where pinkies automatically point up while raising the delicate bone china teacups. It's not to say that men don't ever set foot in here. However, when confronted with the itty bitty delights on the plates, they scarf their share down in a wink and are still hungry for more. I'm thinking I want to relax and enjoy my mini sandwiches and don't want to worry about protecting my portion of goodies from the hungry man across the table. It's a woman's sanctuary. I don't invite my guys here. Ever.

SPRING PETITS FOURS: FOR THE "FOUR FLOWERS PETITS FOURS PAN"
(designed by Williams Sonoma. Manufactured by NordicWare.)
For the Cakes:
1 1/3 cups (170g) cake flour
3/4 t baking powder
1/4 t salt
8 T (1 stick/125 g) unsalted butter
3/4 cup (185 g) granulated sugar
2 eggs, lightly beaten
1 1/2 t vanilla extract
1/3 cup (80 ml) milk
1/2 cup (155 g) seedless raspberry jam (optional)

For the Glaze:
8 cups (1 kg) confectioners' sugar, sifted
4 egg whites
1/2 cup (125 ml) milk
2 T vanilla extract
Food colouring as desired (pastel pink, green or yellow)
*NB: If desired, meringue powder can be used instead of egg whites in the glaze. Omit the egg whites and substitute 1/4 cup (35 g) meringue powder; increase the milk to 1 cup (250 ml).
  • Have all the ingredients at room temperature
  • Position a rack in the lower third of an oven and preheat to 350degrees F (180degrees C). Using a stiff brush, grease and flour the 20-well petits fours pan; tap out the excess flour.
  • To make the cakes, over a sheet of waxed paper, sift together the flour, baking powder and salt. Set aside.
  • In the bowl of an electric mixer fitted with the flat beater, beat the butter on medium speed until creamy and smooth, about 30 seconds. Add the granulated sugar and continue beating until light and fluffy, about 5 minutes, stopping the mixer occasionally to scrape down the sides of the bowl. Add the eggs a little at a time, beating well after each addition. Beat in the vanilla just until incorporated, about 1 minute.
  • Reduce the speed to low and add the flour mixture in three additions, alternating with the milk and beginning and ending with the flour. Beat each addition just until incorporated, stopping the mixer occasionally to scrape down the sides of the bowl.
  • Spoon 1 T of the batter into each well of the prepared pan. Gently tap the pan on a flat surface to eliminate any air bubbles. Bake just until the cakes are no longer sticky on top, about 10 minutes. Transfer the pan to a wire rack and let the cakes cool upright in the pan for 1 to 2 minutes.
  • Set the rack over a sheet of waxed paper, invert the pan onto the rack and lift off the pan. Let the cakes cool completely, about 30 minutes.
  • Meanwhile, wash and dry the pan and repeat with the remaining batter.
  • If desired, using a serrated knife cut the cakes in half horizontally. Place about 1/2 t jam on the bottom half of each cake, then replace the tops.
  • To make the glaze, in a a large bowl, whisk together the confectioners' sugar, egg whites, milk and vanilla until smooth, about 1 minute. Whisk in the food colouring.
  • Using a rubber spatula, transfer the glaze to a bowl with a pouring spout. Slowly drizzle the glaze over each cake, allowing it to completely cover the top and sides before glazing the next cake. Gently tap the wire rack on a flat surface to remove excess glaze. Let the glaze dry completely, about 1 hour, before serving. Makes 40 petits fours.

Variations:

Lemon: Make the cake batter as directed, adding 1 1/2 t lemon extract along with the vanilla. For the glaze, substitute 4 t lemon extract for the vanilla

Almond: Make the cake batter ad directed, adding 3/4 t almond extract along with the vanilla. For the glaze, substitute 1/2 t almond extract for the vanilla

check out the results here.

LinkWithin

Related Posts Widget for Blogs by LinkWithin